 Materials:
 Cork
Funnel with plastic tube
Scissors
Modeling clay
Stiff plastic
Two toothpicks
Pitcher with water
Glass dish
2 liter plastic bottle
Nail
Knife
Tape


Step 2: Cut out 4 pieces of stiff plastic, making them the same size and length as the cork.

Step 3: Fit the pieces of plastic into the slits, making sure they fit tight.

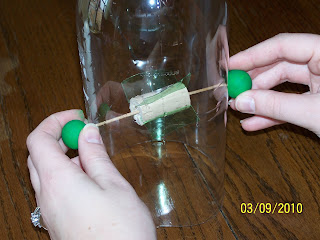
This is the water wheel

Step 4: Using the nail, pierce 2 holes in opposite sides of the bottle.

Step 5: Cut off the bottom of the bottle. Make sure the edge is straight so the bottle can stand upright.

Step 6: Push a toothpick into one end of the cork, then fit it into one hole in the bottle.


Wow this looks like a really fun experiment!.. This would be a great experiment to teach about water power and how some water wheels can produce electricty!
ReplyDeleteThis is great! But, would you have to have the plastic and cork already cut for each student? That seems like it would be a long process. Kids would LOVE to see it in action though!!
ReplyDeleteThis is a very interesting project! I think students would be very interested in learning about water power. Could you use other materials to create a water wheel? Great job!
ReplyDeleteThis is a great experiment. I really like the game that went along with it! Great job! What would happen if you used something other than plastic?
ReplyDeleteNice work ladies. I really liked the renewable and non-renewable resource game because it provided such a nice visual aid. The pictures were also helpful because they showed each step you went through. Would it have worked as well if you had chosen to use different construction materials or does it matter how much water you pour at one time? Overall, very impressive :)
ReplyDelete